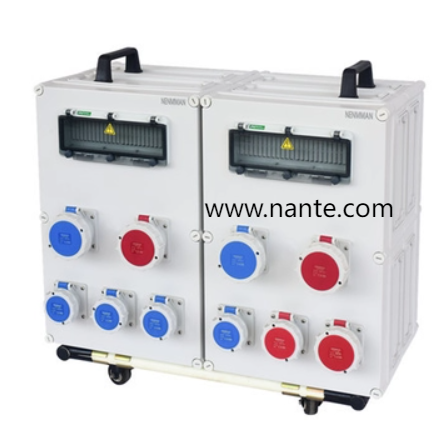
When planning a home workshop or upgrading a garage, many consider adding a distribution Socket Box to streamline power access. Whether you’re a hands -on homeowner tackling a weekend project or an electrician managing complex installations, understanding the steps and safety measures ensures reliable operation and peace of mind. From initial layout planning to final circuit testing, careful adherence to best practices prevents overloads and maintains compliance with electrical codes.
For the DIY enthusiast, begin by mapping out outlet locations and calculating anticipated power draw. Secure a sturdy mounting surface—metal studs or a reinforced wall panel work best—to support the enclosed unit. Always switch off the main breaker before handling live lines, and use a voltage tester to confirm power is off. Install conduit and cable glands neatly, feeding each cable through labeled ports. Tighten connections on individual breakers and outlets with the correct torque, then ground the enclosure to prevent stray currents.
Electricians often streamline this process by pre -assembling modules on a workbench. They wire the incoming feed to a main breaker, then daisy -chain sub -circuit breakers to dedicated outlet rows. Surge protection devices plug into designated slots, guarding attached equipment from voltage spikes. Professionals mount the complete assembly, making final adjustments to alignment and seal integrity. A thorough continuity check and infrared inspection confirm no loose connections or hotspots remain before energizing.
Both approaches benefit from careful planning around load balancing. Group high -amp circuits—such as welders or air compressors—separately from low -draw outlets for chargers and lights. This separation minimizes nuisance trips and extends equipment lifespan. Homeowners should resist the temptation to exceed rated capacities, while electricians use load calculators to validate branch sizing. Clear labeling on covers helps users identify which breaker controls each outlet cluster.
Weather -resistant units suit outdoor or semi -exposed settings. Use gasketed doors and stainless -steel hardware to protect against moisture and dust ingress. Seal any wall penetrations with approved compound to maintain enclosure ratings. For indoor garages that double as hobby spaces, a clean, flush -mounted box contributes to a professional look while hiding messy cable runs. Both DIYers and tradespeople can spray -paint or wrap conduit to match décor without compromising functionality.
Testing forms a crucial final step. After reactivating the main feed, switch each breaker on individually while monitoring for sparks, unusual noises, or tripped protection. Homeowners might plug in a simple lamp or drill, while electricians employ calibrated test loads. Document voltage levels and record breaker trip thresholds. A snug door closure and gasket check verify the unit remains sealed during everyday use.
Ongoing maintenance keeps the system safe. Inspect the box periodically for loosened screws or signs of wear. Replace any surge modules that have diverted serious spikes. DIYers can visually examine connections, but complex faults warrant a professional revisit. Electricians recommend infrared scans during annual safety checks to detect overheating before it becomes a hazard.
Choosing a high -quality enclosure from a reputable brand simplifies every step. A trusted supply’s pre -wired options, modular breaker slots, and clear documentation reduce installation time and guesswork. Whether taking on a weekend DIY or contracting a certified installer, selecting a robust distribution solution lays the foundation for flexible, safe power distribution in any environment. For durable, versatile options engineered for performance and safety, visit www.nante.com/product/ .


